Donc ici, on a le choix entre 3 options. Crée qu’une zone directe bien pour une petite entreprise et simple a géré. Crée une zone directe et inversée, donc création d’une zone directe et d’une zone inversée. Une zone inversée est plus performante qu’une zone directe bien pour de grand réseau et indispensable pour certain périphérique réseau. Et la troisième option configure uniquement les indications de racine pour votre serveur DNS. Les indications de racine sont des informations sur les serveurs DNS racine qui permettent à votre serveur DNS de résoudre les noms de domaine complets (FQDN).
##### Donc pour la documentation je vais prendre la 3ème option. Si vous sélectionné la première option, vous devez donc vous arrêter au moment de la configuration de la zone inverse. # c) Zone directe c) Zone directe #### Donc pour la documentation je vais prendre la 3ème option. Si vous sélectionné la première option, vous devez donc vous arrêter au moment de la configuration de la zone inverse. #### Donc on va prendre la première option qui est crée la zone directe maintenant. #### 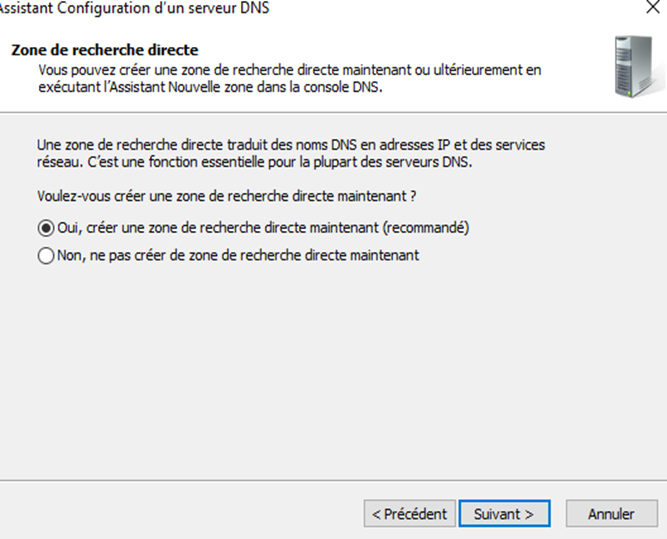 #### Donc on fait zone principale car c’est un serveur DNS principal que nous créons. #### [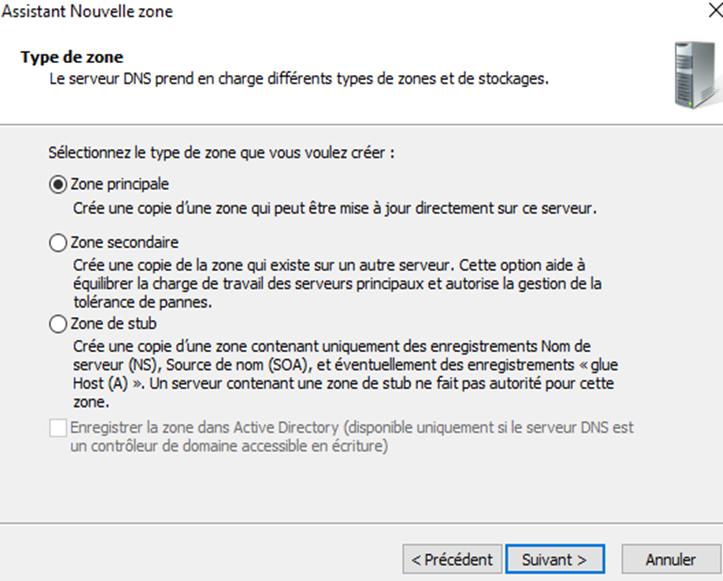](https://docu.lerenard.eu/uploads/images/gallery/2024-04/Q0MhxWKYIpiiltNE-tvicqbveqzfwks6j-embedded-image-ykrtnlpk.png) #### Donc vous mettez le nom que vous voulez pour votre DNS. Dans mon exemple c’est criee.Poulgoazec mas vous pouvez très bien mettre : #### Terra.hifi, Moji.fr, domaine.com, exemple.obligatoire #### 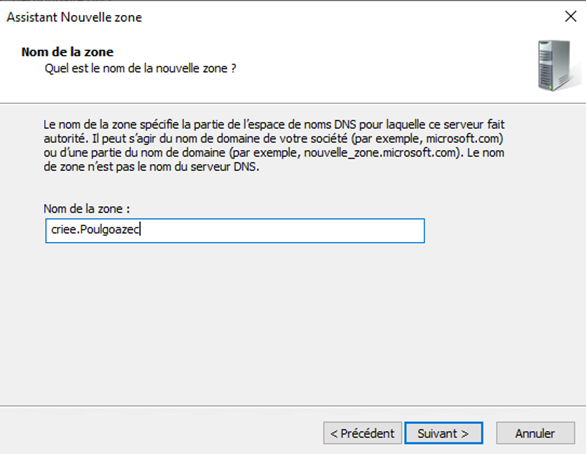 #### Une fois que vous avez cliquez sur suivant, il dira le nom du fichier DNS qu’il créa. #### #### 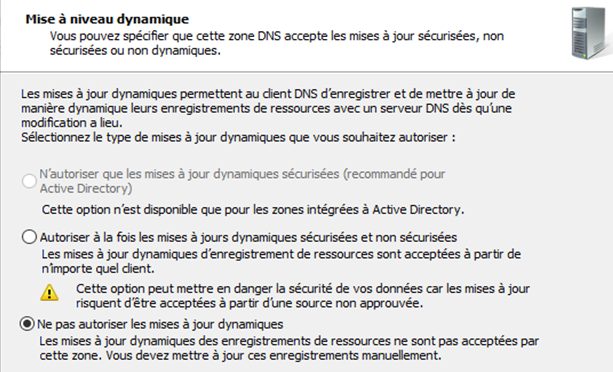 #### Puis on met pour des questions de sécurité, on ne met pas enregistrement automatique (dynamique). #### #### #### #### #### #### # d) Zone inversée ##### d) Zone inversée ##### Ensuite, nous créons la zone inverse. Vous sélectionné donc Oui : 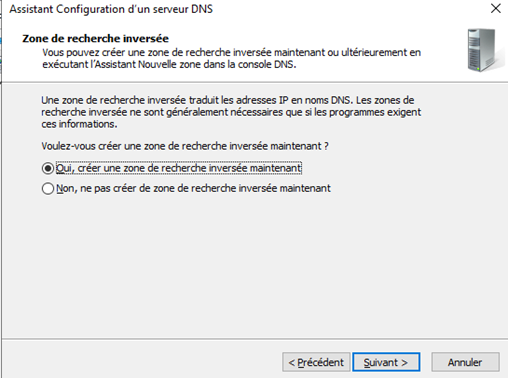 ##### Cette Zone inverse sera donc une Zone inverse principal : 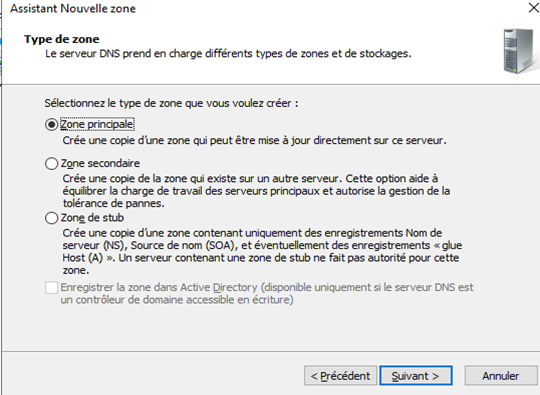 ##### Pour mon cas, c’est une zone inverse en IPv4. Si vous le souhaitais, vous pouvez faire en IPv6 mais je ne garantie pas que cela soit pareil : 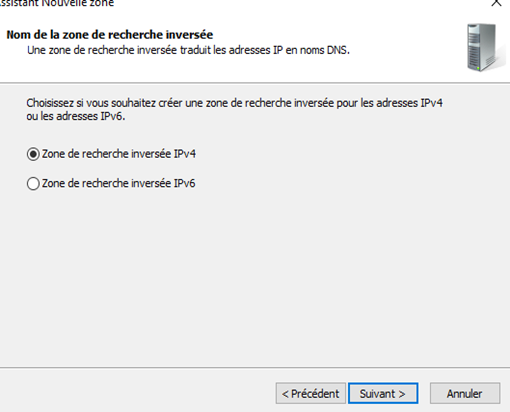 ##### On met l’ip réseau dans ID réseau. Pour mon cas, l’ip réseau est 192.168.36.0/24 : 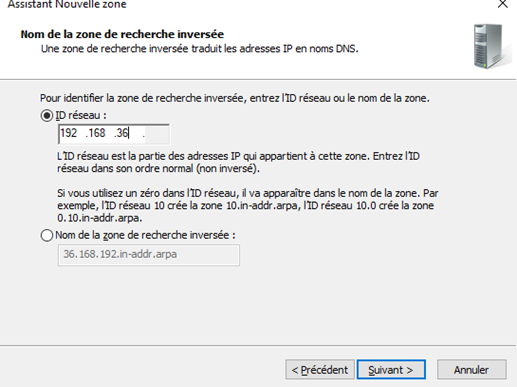Par exemple une ip réseau peux être 172.22.30.0/24 ou 172.36.0.0/16
##### Et il nous dit le nom qu’il donnera au fichier de la zone inverse : 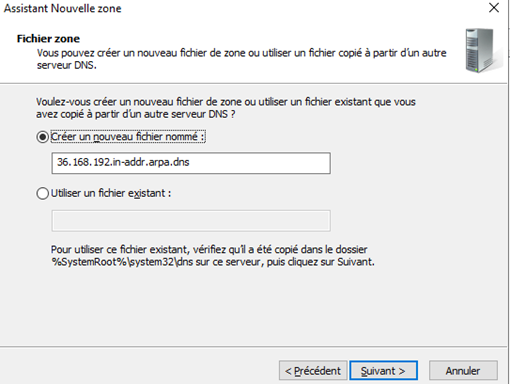 ##### Comme plus haut on n’autorise ni les mises à jour dynamiques ni rediriger les requêtes vers un autre serveur DNS : 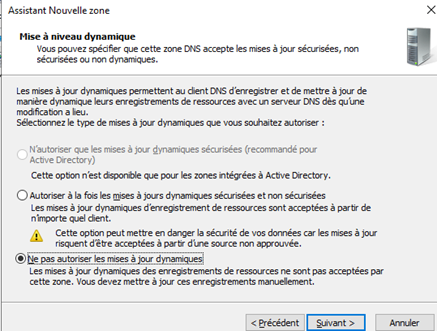 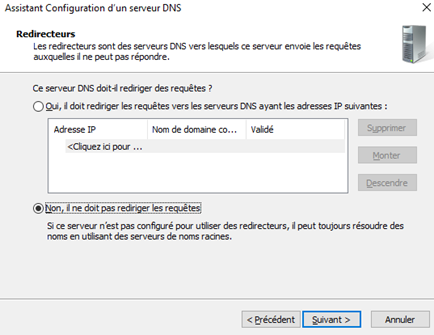 ##### Donc il va rechercher des indications de racines mais il ne va pas en trouver et une fois le message fermé c’est la fin de configuration : 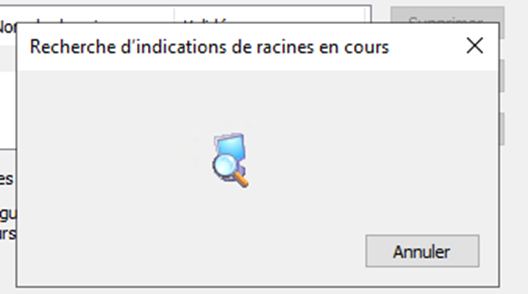 [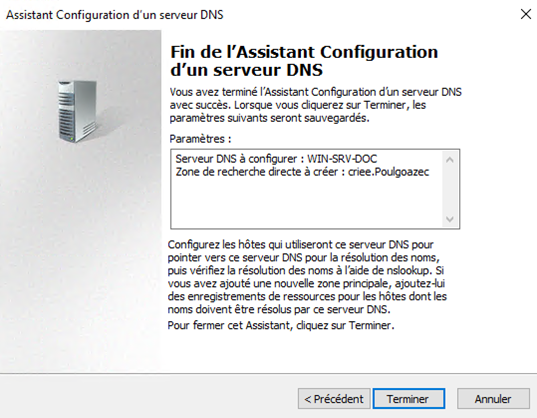](https://docu.lerenard.eu/uploads/images/gallery/2024-04/x1QFdOdBfA2eRX8F-573d2351-eb17-48c1-bb95-9e20d2f44969.png) # e) Création d’un nom de domaine local ##### e) Création d’un nom de domaine local ##### Arrivé ici, vous faite votreserveur>zone de recherche direct>votrenomdns.exemple ##### Dans mon cas c’est criee.Poulgoazec 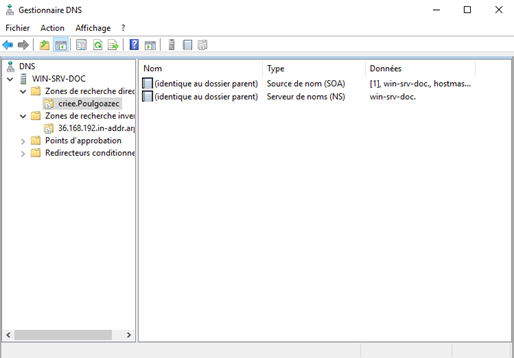 ##### Vous faite clique droite sur votre nom de domaine et faut faire : Nouvel hôte (A ou AAAA) [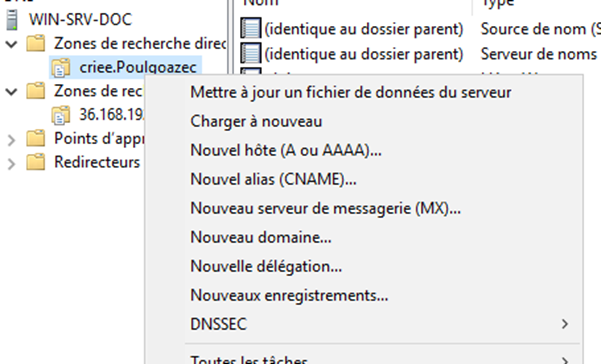](https://docu.lerenard.eu/uploads/images/gallery/2024-04/wpcD6D6yNpHkev1d-download.png) ##### ##### Donc vous mettais un nom comme vous voulez, dans mon cas c’est glpi. Après il montre le nom complet que ça fera. Et a la fin il faut mettre l’ip du serveur ou services sur le quel le nom de domaine dirigera. ##### Puis vous faite Ajouter un hôte 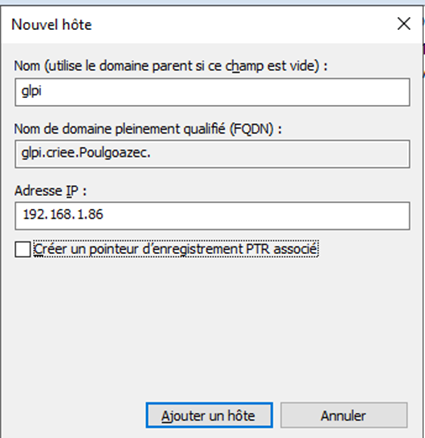Donc dans mon cas si je tape glpi.criee.Poulgoazec cela redirigera vers 192.168.1.86 caché par glpi.criee.Poulgoazec.
# f) Mise en place de l’ip du serveur DNS sur un client ##### f) Mise en place de l’ip du serveur DNS ##### Sur un autre système, pour mon cas Windows 10, allé dans « Panneau de configuration > Réseau et Internet> Centre Réseau et partage » : 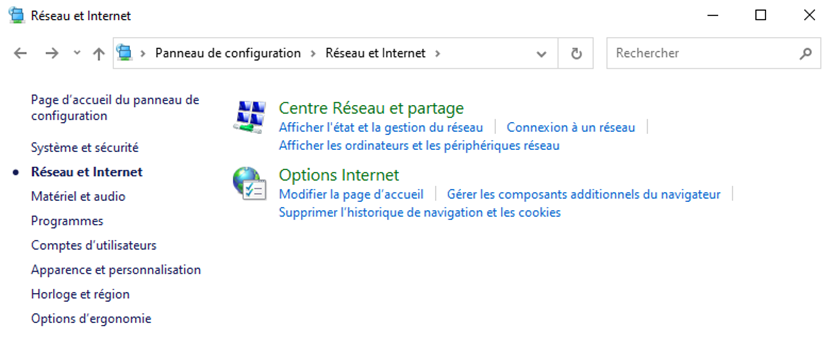 ##### Dans mon cas je clique sur Ethernet mais cela peut différer. Dans mon cas Ethernet est la carte par la quel internet arrive. Puis faite propriétés : 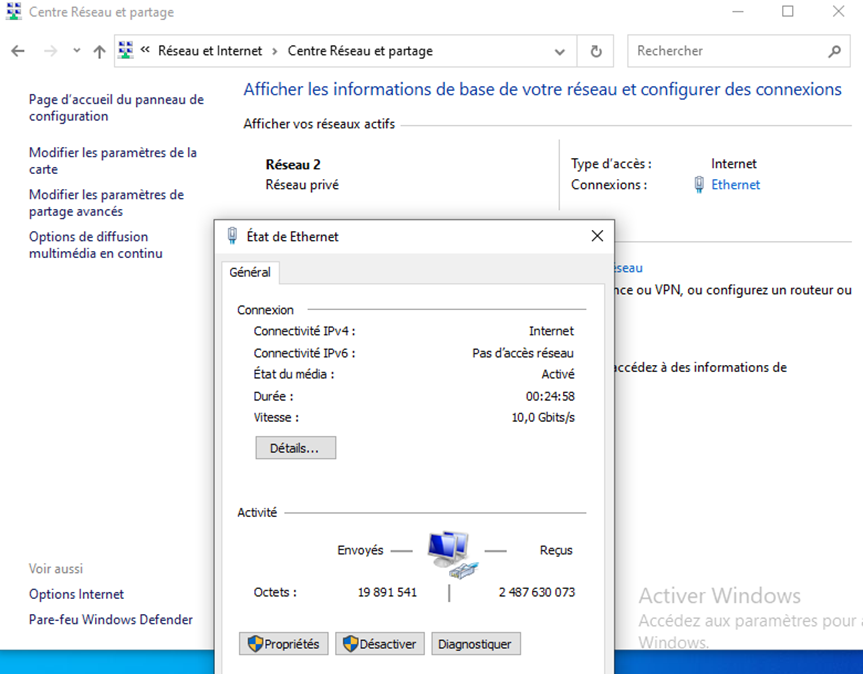Vous devriez donc arriver sur Propriétés de Xxxxx pour moi ces « État de Ethernet ».
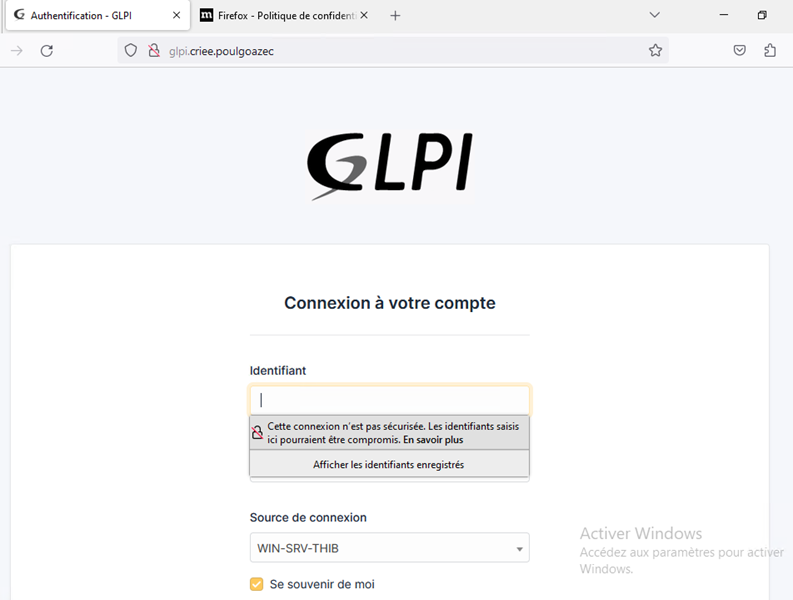
##### Arrivé ici, double cliqué sur « Protocole Internet version 4 (TCP/IPv4) » : 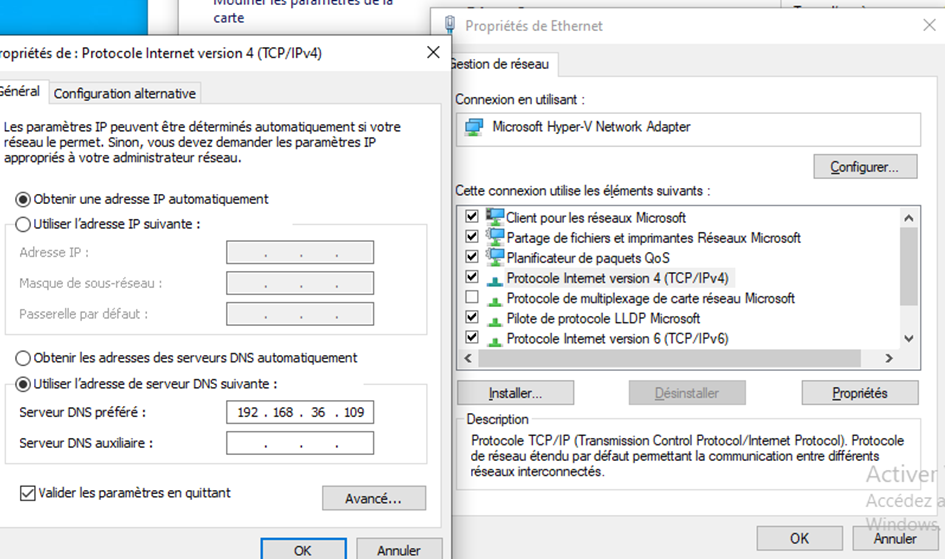 ##### Mettez « Utiliser l’adresse de serveur DNS suivante : » et rajouté l’ip de votre serveur DNS. Pour mon cas c’est 192.168.36.109 et coché "Valider les paramètres en quittant". # g) Test du nom de domaine créée #### g) Test du nom de domaine créée ##### Donc dans un navigateur j’ai écrit glpi.criee.Poulgoazec et cela fonctionne parfaitement bien : #####